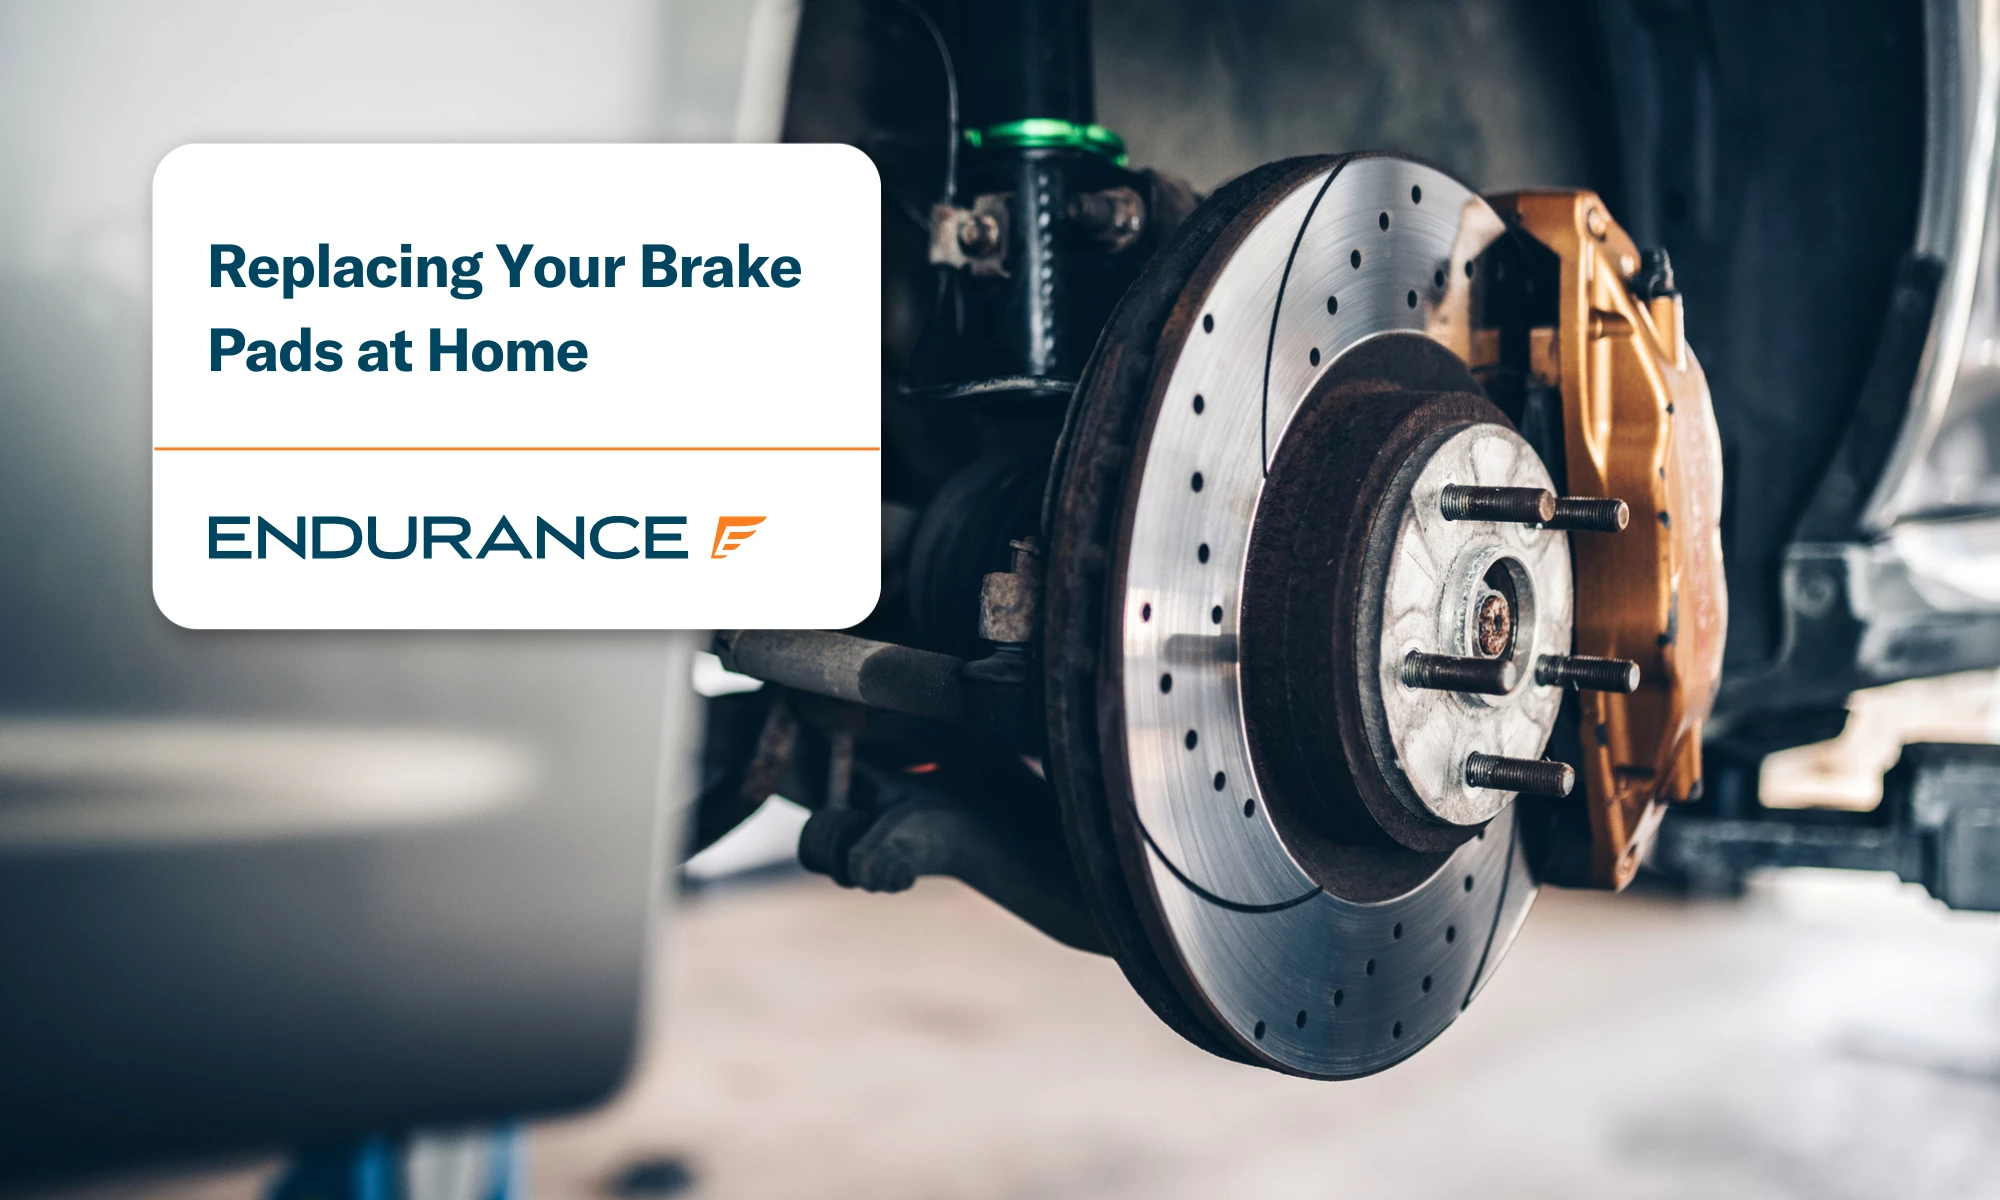
Replacing Your Brake Pads at Home
Brake pads are one of the most crucial components of your vehicle’s braking system, ensuring your car stops safely and efficiently every time you press the brake pedal. Like all “wear and tear” parts, brake pads degrade over time and require regular replacement.
While taking your vehicle to a repair shop is always an option, doing a brake pad change at home can save money and give you a better understanding of how your vehicle works. With the right tools and preparation, it’s a manageable task for many car owners.
This guide will walk you through the process of a DIY brake pad change for common vehicles, with a focus on safety, simplicity, and efficiency. You’ll also learn how to recognize when it’s time for a replacement and how an auto protection plan like Endurance can help you plan for future repairs and maintenance.
Understanding Brake Pads and Their Importance
Brake pads are the material that presses against your brake rotors to slow or stop your vehicle. As such, they play an essential role in your car’s overall safety. Each time you hit the brakes, however, the pads absorb a significant amount of energy and heat, gradually wearing them down.
If ignored, worn brake pads can damage other brake system components, including rotors and calipers, ultimately leading to more costly repairs. In the most extreme cases, failure to replace brake pads in time can compromise your ability to stop the vehicle safely.
When Should You Replace Your Brake Pads?
Recognizing the signs of brake pad wear helps prevent more serious issues. Watch carefully for these common indicators:
- Squealing or screeching sounds: A built-in wear indicator is designed to make noise when the pads are low.
- Grinding noises: This means the pads are fully worn, and metal is contacting the rotor—a critical situation.
- Reduced braking performance: If stopping distances increase or the brake pedal feels soft, the pads are most likely worn.
- Vibrations when braking: This could signal uneven pad wear or warped rotors.
- Dashboard warning light: Some modern vehicles alert you when pads are due for replacement.
As a general guideline, consider changing your brake pads every 25,000 to 65,000 miles. However, factors like driving habits, terrain, and vehicle type can affect this timeline. It’s also smart to include brake inspections during routine maintenance, as this may help you spot problems sooner.
Tools and Materials Needed
Before starting your DIY brake pad change, gather the following items:
- New brake pads (appropriate for your vehicle’s make and model)
- Car jack and jack stands (never rely on a jack alone)
- Lug wrench or tire iron
- Socket wrench set
- C-clamp or brake caliper tool
- Brake cleaner
- Anti-squeal or anti-seize grease (optional)
- Safety gloves and glasses
- Torque wrench (to secure lug nuts)
- Bungee cord or wire hanger (to suspend the caliper)
Proper tools not only make the job easier but also ensure a safer work environment. Take a few minutes to double-check that you have everything and it’s all in working order before you begin.
Preparing Your Vehicle to Change the Brake Pads
It’s important you take the proper steps to prepare your vehicle. Make sure to:
- Park on level ground and apply the parking brake.
- Loosen the lug nuts slightly before lifting the vehicle.
- Raise the vehicle using a jack, and place it securely on jack stands.
- Remove the wheel to expose the brake caliper and rotor.
Refer to your owner’s manual for jack point locations and any model-specific guidance. Always double-check that your vehicle is stable before getting underneath.
How to Remove Your Old Brake Pads
First things first, you need to remove the old brake pads:
- Locate the brake caliper, which sits over the rotor.
- Remove the caliper bolts using your socket wrench. Do not allow the caliper to hang by the brake hose—suspend it with a bungee cord.
- Slide out the old brake pads. They may be clipped in place.
- Inspect the rotor for grooves or warping. If it appears damaged, consider resurfacing or replacing it.
Some auto parts stores offer free rotor thickness checks, which can help you decide whether a rotor replacement is necessary. If your rotors are below the minimum thickness, new pads alone won’t restore optimal braking power.
Installing New Brake Pads
Now that you have the old brake pads removed, you can put the new ones on:
- Clean the brake assembly with brake cleaner to remove built-up dust and debris.
- Compress the caliper piston using a C-clamp or special tool. This creates enough space for the new, thicker pads.
- Install the new brake pads in the same orientation as the ones you removed.
- Apply anti-squeal grease to the contact points to prevent noise during operation. Ensure the pads are seated securely and that any clips or shims are reinstalled correctly. Misalignment can lead to uneven wear or brake noise.
- Reattach the caliper and tighten the bolts to the manufacturer’s torque specs. Avoid over-tightening to prevent damage.
Some calipers use a sliding mechanism that needs lubrication. If yours does, inspect the caliper pins and clean or grease them if necessary.
Reassembling and Testing
With the new brake pads installed, you’re almost ready to hit the road again. But first:
- Reinstall the wheel and hand-tighten the lug nuts.
- Lower the vehicle, then tighten the lug nuts in a star pattern using a torque wrench.
- Pump the brake pedal until it feels firm. This seats the new pads against the rotors.
Before heading out, double-check your work and ensure there are no tools or loose bolts left behind.
Take your vehicle for a low-speed test drive in a safe area. Light braking during the first few hundred miles allows the pads to bed in properly. A slight burning smell during the first drive is normal and should dissipate quickly.
Maintenance Tips and When to Seek Professional Help
Some top brake maintenance tips include:
- Inspect brake pads regularly, especially during tire rotations or oil changes.
- Avoid harsh or sudden braking to prolong pad life.
- Replace brake pads in pairs (front or rear) to maintain even braking.
- Monitor brake fluid levels when doing brake work.
- Listen for new noises after installation—it could signal loose hardware or misalignment.
- Seek professional help if you notice fluid leaks, uneven wear, or feel uncertain at any stage.
Some vehicles have more complex braking systems, such as electronic parking brakes or integrated sensors, that may require additional steps or dealer tools. If your DIY efforts feel overwhelming, there’s no shame in turning to a trusted mechanic: brakes are an essential safety feature and must be replaced correctly.
How Endurance Auto Protection Can Cover Your Vehicle Repair Bills
While wear and tear items like brake pads aren’t usually covered under most extended warranties, Endurance offers vehicle service contracts that include maintenance-related services. For instance, our Advantage plan can include routine services such as brake pad replacement as part of scheduled maintenance. A great deal for budget-conscious drivers.
Even if you’re comfortable with basic DIY tasks, an auto protection plan helps safeguard you from larger, unexpected issues. Components like the brake caliper, master cylinder, or ABS system can be costly to repair and may be covered under select vehicle service contracts.
Endurance auto protection plans can also help cover the following (though be sure to check your contract for details):
- Brake lines and hoses affected by leaks or corrosion
- Hydraulic components, including the proportioning valve
- ABS modules, which are complex and expensive to replace
- Electrical brake assist systems found in newer vehicles
Our customers benefit from financial protection and enjoy driving confidence. Whether you’re commuting daily or planning a cross-country road trip, having a comprehensive extended car warranty or vehicle service contract reassures you that help is never far away.
Choose Endurance Vehicle Protection for Total Driving Confidence
Replacing your brake pads at home is a valuable skill that saves money and builds confidence in maintaining your vehicle. With the right tools (and safety practices), a DIY brake pad change can be relatively easy to complete. Regular brake maintenance ensures not only your safety but also the long-term performance of your car’s braking system. And when you combine that with coverage from Endurance, you’re even better prepared for what’s ahead.
To find out more about our customizable vehicle protection plans and which might be right for you, speak with an Endurance advisor at (800) 253-8203 or request a FREE quote. You can also see your price and plan recommendations on our online store, or head over to our extended warranty blog for more helpful articles.


Since the age of 16, Keith has been immersed in the automotive industry, beginning his career by helping his dad fix vehicles at a young age. Keith now owns his own family-run, ASE Certified repair shop, A+ Autocare. At his shop, he focuses on building trusting relationships with his community through exceptional customer service. Read more about Keith.